Click to download firmware and TASOLLER Options V2.8
|
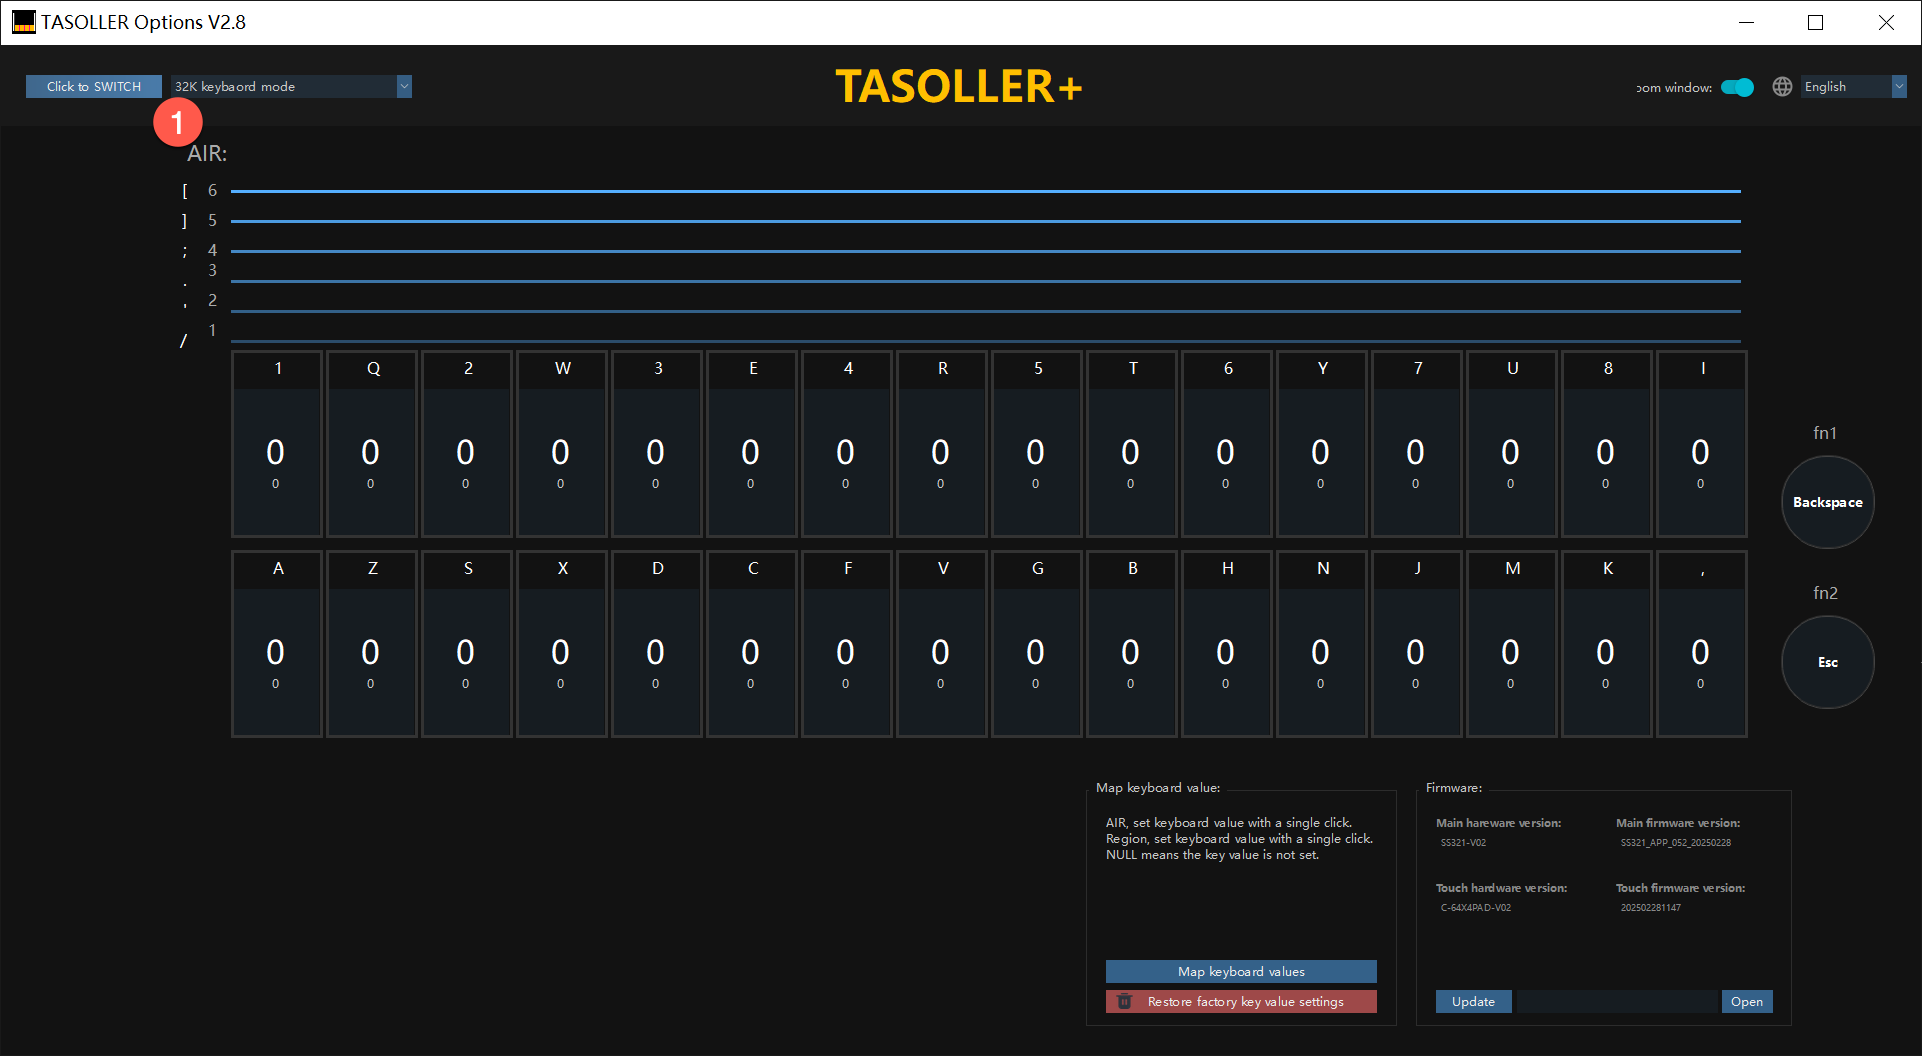
No. |
Function |
Technical Description |
|
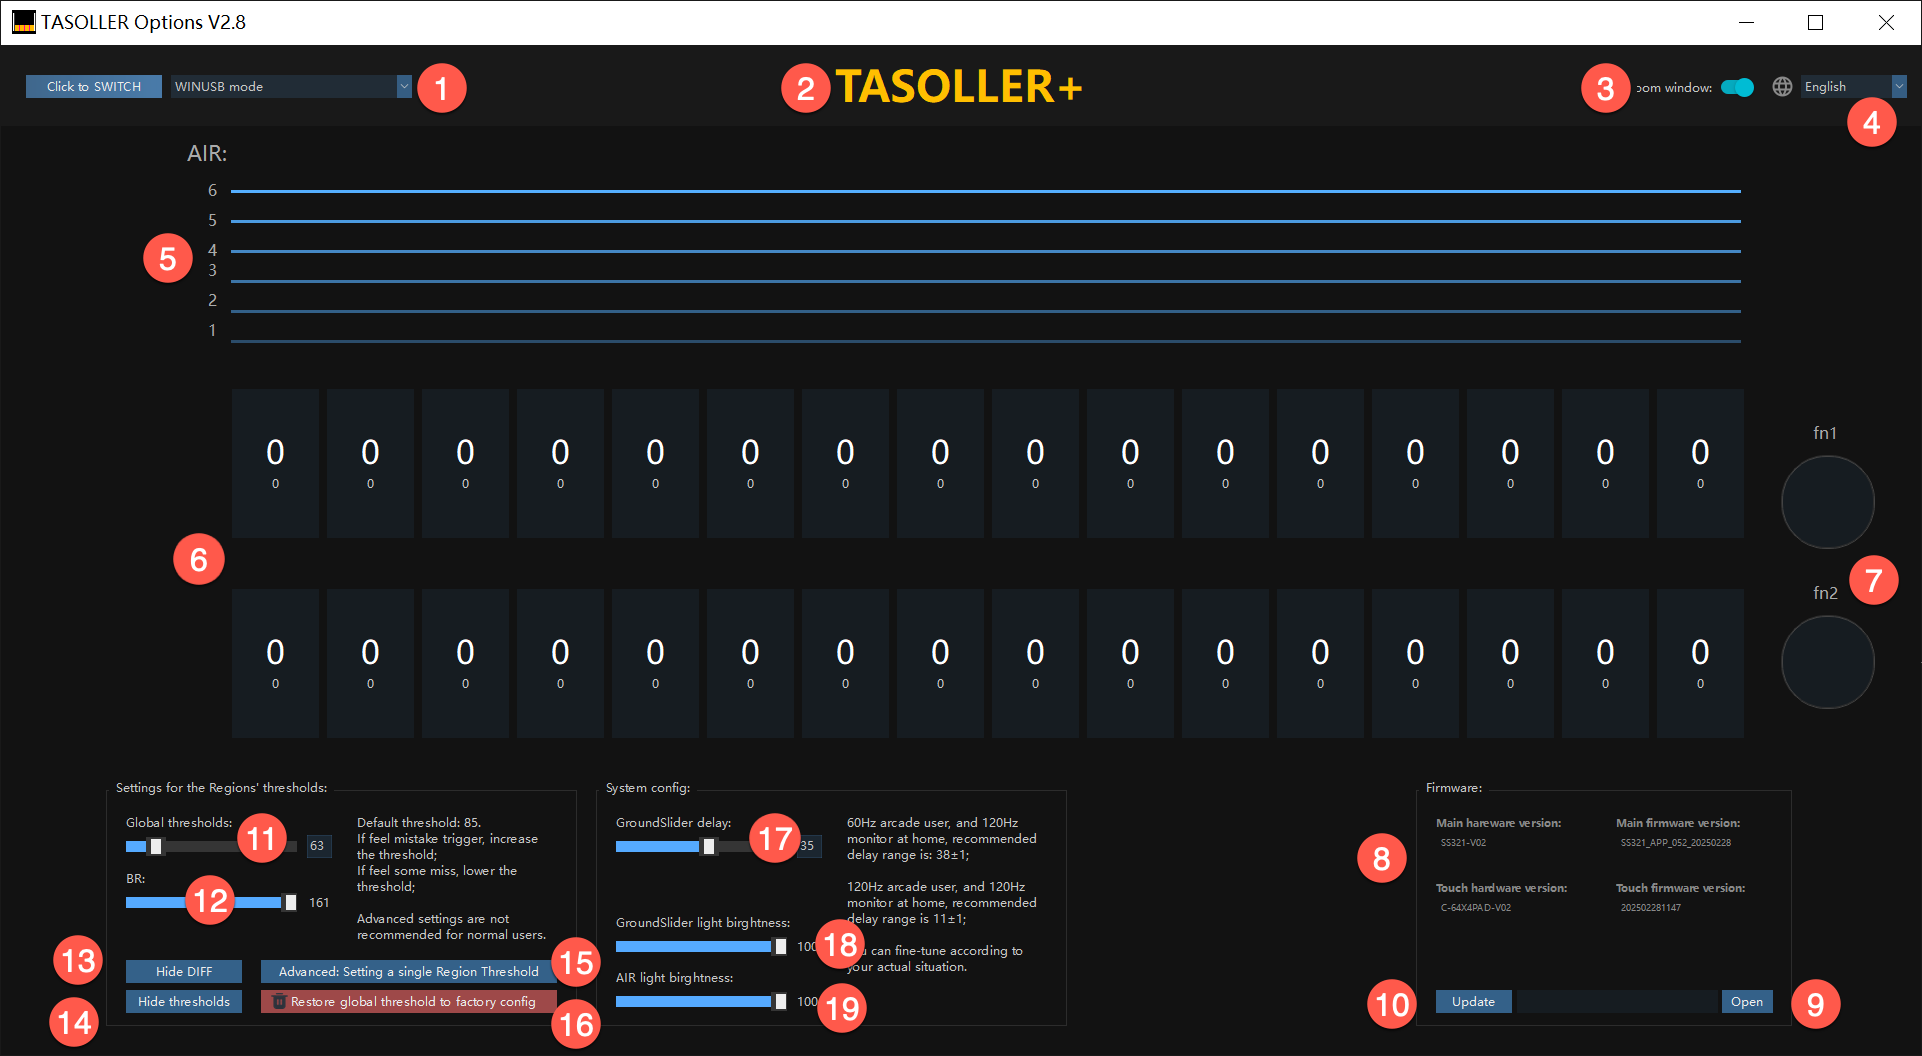
1 |
Mode Switch |
Optimize operational configurations through intelligent mode adaptation |
|
2 |
Controller Linkage Verification |
Grey: Controller disconnected |
|
3 |
Window Scaling |
Active: Native 100% DPI rendering |
|
4 |
Language |
Real-time multilingual interface adaptation via dropdown menu |
|
5 |
AIR Zone |
Real-time spatial interaction visualization |
|
6 |
Sensor Zone |
Numerical representation of current contact surface area (Minimum detection threshold: 20 units) |
|
7 |
FN1/FN2 Button |
|
|
8 |
Firmware information |
Display current hardware/firmware version. |
|
9 |
Open Firmware |
Click the button to select the firmware. |
|
10 |
Update |
Click to start to update the firmware. |
|
11 |
Global Threshold |
Setup the same threshold of 32 touch buttons at same time. |
|
12 |
BR Value |
Tactile response curve modifier (3.1.2) |
|
13 |
Raw Data Masking |
Diagnostic-level touch signal visualization (Debugging exclusive) |
|
14 |
Custom Threshold Masking |
Advanced parameter visualization (Debugging exclusive) |
|
15 |
Individual Key Calibration |
Per-key sensitivity fine-tuning (Recommended for professional calibration scenarios only) |
|
16 |
Factory Reset |
Full parameter restoration (Critical system reset - non-destructive operation) |
|
17 |
Signal Latency |
Only affects touch button. If the fast ratio in the game is too high, it is recommended to modify the parameters here first. (Parameter unit is milliseconds) |
|
18 |
GroundSlider light brightness |
Recommended 70%-100%; |
|
19 |
AIR light brightness |
Recommended around 70%; |
If you notice phantom inputs (unintended or accidental triggers caused by oversensitivity), it is recommended to increase the threshold to reduce the likelihood of these false activations.
Precondition: B parameter (delay parameter) in the game, please use your own parameters on the arcade (Japanese cab or International cab);
Adjust according to your own preferences, the recommended range is 70-100;
|
No. |
Function |
Technical Description |
|
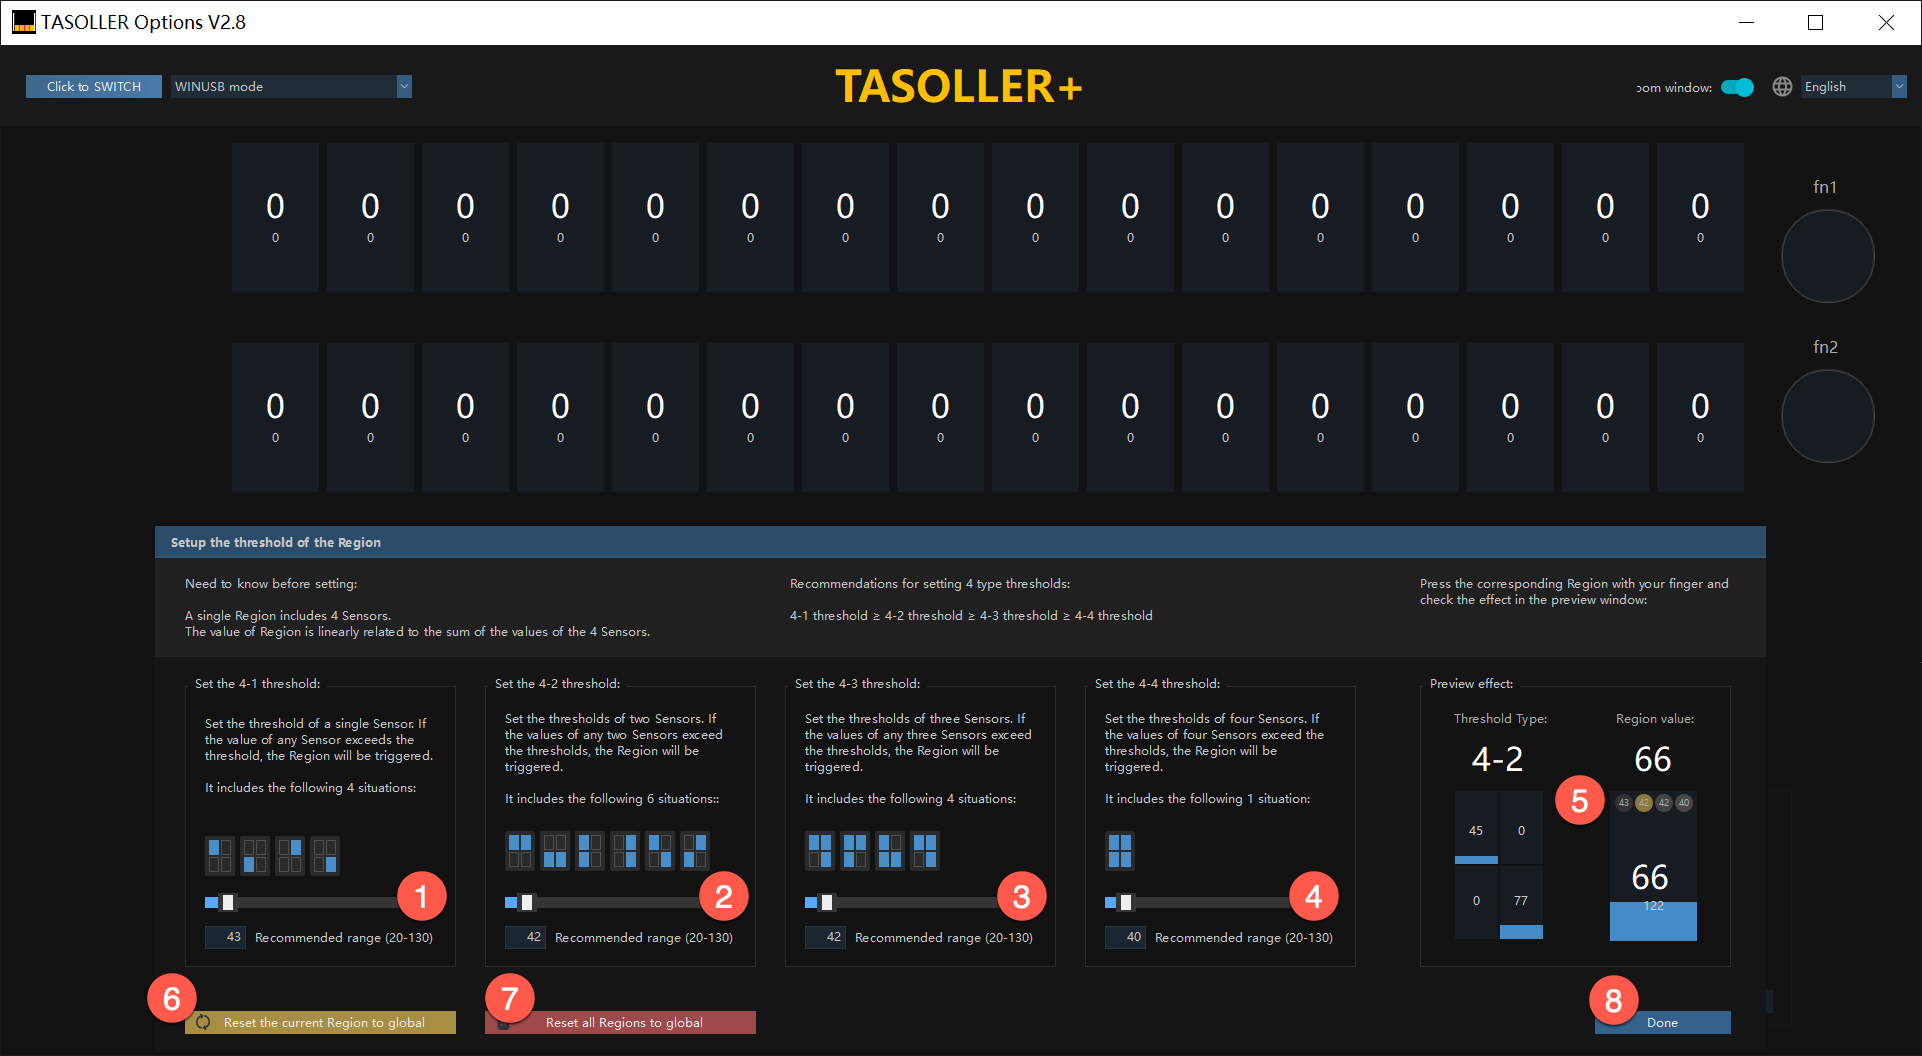
1 |
Case 1 Threshold |
After setting the threshold, the overall threshold will no longer affect this button. |
|
2 |
Case 2 Threshold |
After setting the threshold, the overall threshold will no longer affect this button. |
|
3 |
Case 3 Threshold |
After setting the threshold, the overall threshold will no longer affect this button. |
|
4 |
Case 4 Threshold |
After setting the threshold, the overall threshold will no longer affect this button. |
|
5 |
Threshold Observation Window |
Real-time display of the trigger values of 4 sensors; Used as a reference for settings. |
|
6 |
Reset current button to global |
Reset the parameters of the current button to the global threshold parameters; |
|
7 |
Reset all buttons to global |
Reset all modified button parameters to the global threshold parameters; |
|
8 |
Done |
Click to exit this window |
|
No. |
Function |
Technical Description |
|
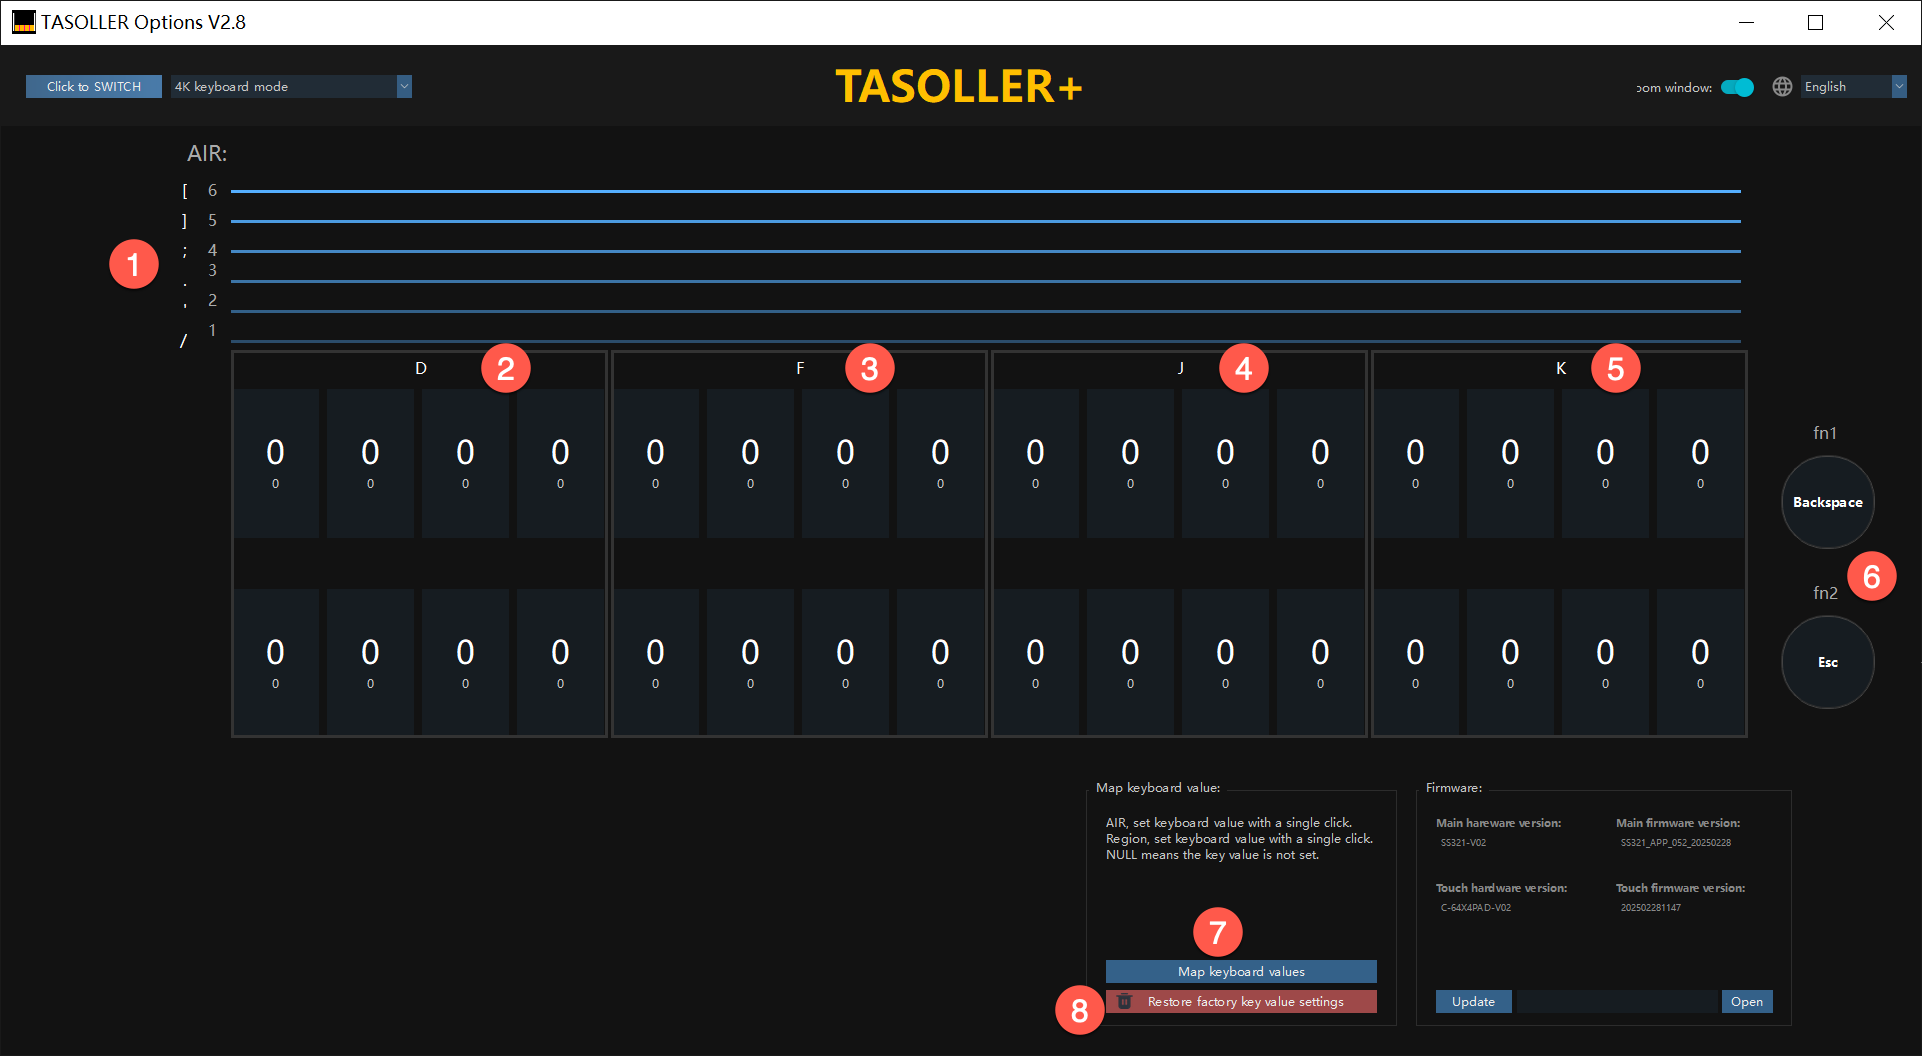
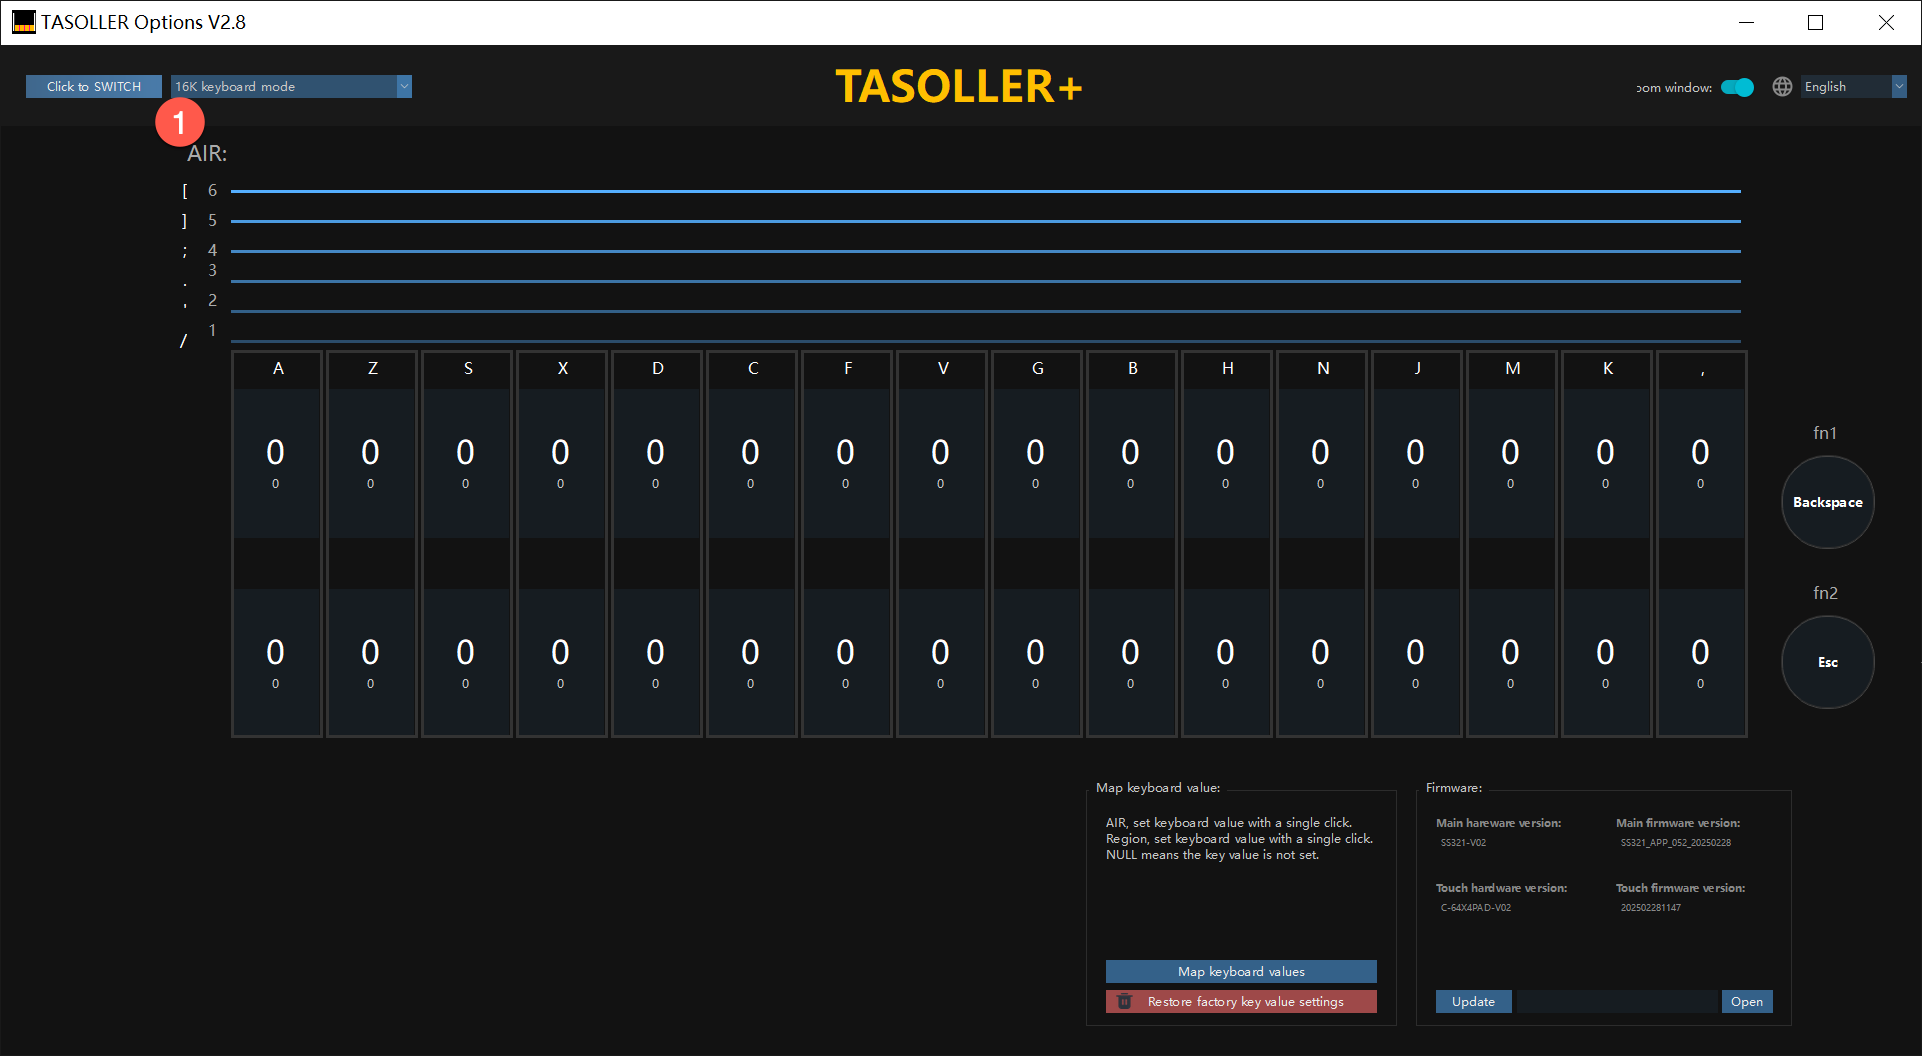
1 |
6 air mappings |
The current 6 air-mapped keyboard values; |
|
2 |
4K-1 |
All 4 keys output 1 key value; |
|
3 |
4K-2 |
All 4 keys output 1 key value; |
|
4 |
4K-3 |
All 4 keys output 1 key value; |
|
5 |
4K-4 |
All 4 keys output 1 key value; |
|
6 |
FN1 and FN2 key values |
|
|
7 |
Map keyboard values |
Click the button, and a pop-up window will appear to map the key values; |
|
8 |
Restore factory settings |
Click the button to restore the key value mapping in the current mode; |

|
No. |
Function |
Technical Description |
|
1 |
Clear button |
|
|
2 |
Done |
After setting all the keys, click Finish to exit the setting; |

For the game's hardware, there is a threshold mechanism. They are 20, 40, 60, and 80. This adjustment range is relatively rough, so it is not recommended to adjust the threshold in the game test, and it is fixed to 20.
This is a debugging function reserved for official technical support and is strongly not recommended for players to use.


